January 2014: Leap into 2014 with a freshly organized digital life so you can streamline your day, find things at a glance, not forget what you’re supposed to do and have more free time. What a super New Year’s resolution!
Part One of our Massively Helpful Tips for Microsoft Outlook series explains how you can use Categories to quickly sort and manage tasks, emails, contacts and more:
All Outlook items include the Category view so you can quickly view all of your emails, contacts, appointments, and tasks based on a color-coded category. The following tips work with Outlook 2013 and 2010 for Windows 7 and 8 (see below for a link to an Outlook 2007 tutorial). Outlook in the cloud works a little differently, as does Outlook for Mac 2011.
1. Creating categories
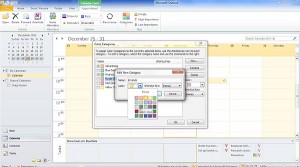
Categories are like tags for your Outlook items, whether they’re emails, contacts, tasks, notes or appointments. Outlook comes with a standard set of categories and any Outlook item can be assigned more than one category. The magic starts when you create your own Categories — just use the Categorize command button and select New in the dropdown menu. Name your new category anything you like and, if you want, assign it a Shortcut Key (highlight it, click the Shortcut Key menu, choose a shortcut and click OK). However, to keep from having to remember too many new things at once, you might want to only assign shortcut keys to your top two or three categories at first.
 2. Color coding
Choose a color for your new category that will make it more intuitive for you to remember. When you keep related categories in the same color family, such as using variations of green for work projects and variations of blue for personal projects, you’ll train your brain more quickly and make it more intuitive to create, track and manage items as you go along. You can also easily change the names for the default color categories — choose All Categories from the Categories menu, then simply highlight, type the new name and click OK.
3. Quick Click
Your Quick Click color category is your default color category. You can set it from the Categories menu in any open Outlook item, and you can change it as often as you like. Changing the Quick Click color does not change color categories already assigned to items, just the color that an item is automatically assigned when you add it. It’s a great timesaver when you’re creating a lot of Outlook items for a new or ongoing project.
4. Emailing contacts in a category
Sending an email to all of your Outlook contacts that have been assigned to a Category is easy in Category view. Just click on the Category and drag it to Email. Outlook will automatically create an email for all of the people in that category (this is similar to using a Personal Distribution List). You can also create labels in Word based on a Category. Talk about an easy way to send out meeting requests, holiday cards or photos of your favorite tree frog!
Next month look for tips on side-by-side panes and click-and-drag techniques. Meanwhile, here’s more on Outlook categories and getting organized with Outlook:
Video Tutorials:
Navitend: How To Work With Microsoft Outlook Categories
Lynda.com: How To Customize Categories In Outlook (Outlook 2007)
For Dummies Cheat Sheets
Outlook 2013 For Dummies – Cheat Sheet
Outlook 2010 For Dummies – Cheat Sheet
Microsoft
Create and manage custom categories and groups in the Navigation Pane
Add contacts to color categories
Assign a color category to an email message
Articles and Forums
How to search in Outlook categories when you have a lot of them
How to backup and restore your categories
10 tips for mastering Microsoft Outlook 2013
| You may also be interested in: |

